- FAQ

Domains
SSL certificates
Payments
Emails
FTP
Databases
Backups
Websites
How to add an HTML element in WordPress
Using HTML elements allows, for example, to change the type of hyperlinks, resize headers and to do many other things.
Here is a list of HTML tags that may be used in Wordpress: address, a, abbr, acronym, area, article, aside, b, big, blockquote, br, caption, cite, class, code, col, del, details, dd, div, dl, dt, em, figure, figcaption, footer, font, h1, h2, h3, h4, h5, h6, header, hgroup, hr, i, img, ins, kbd, li, map, ol, p, pre, q, s, section, small, span, strike, strong, sub, summary, sup, table, tbody, td, tfoot, th, thead, tr, tt, u, ul, var.
To add an HTML element on your page:
- 1) Sign in to the Wordpress admin panel (https://happyuser.com/wp-admin/ , where happyuser.com is your domain).
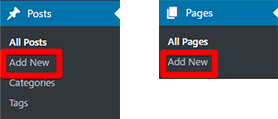
- 2) In the WP admin panel click on Posts -> Add new or Pages -> Add new, according to the place where you want to add an HTML element.
- 3)Go to the Text section.
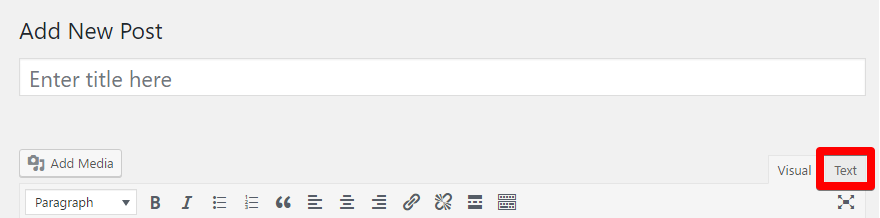
Here, using the buttons in the panel on the top, you can add various HTML elements, such as quotes (b-quote), img (ul, ol, li) and others. For example, a link to the email address will look like this:

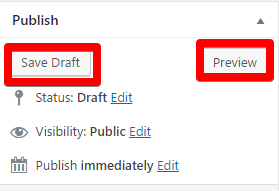
Click "Save" and "Preview" to see how the item looks like on the page.
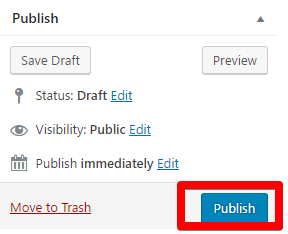
If you have added an HTML element and it looks as you wanted on the page, click Publish:
 Hosting protected by Avast software